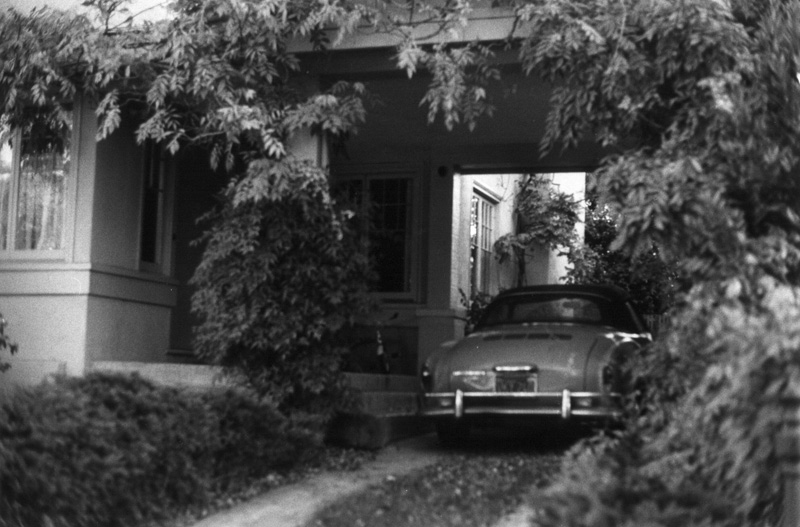
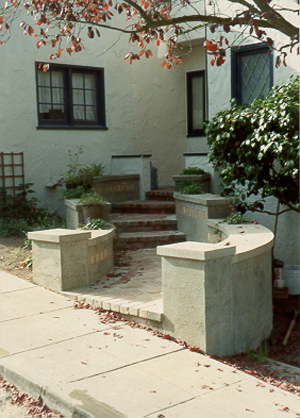
An entrance transition is the area between the street and the front door of a building. When it is made well, it makes a transition from public to private, and the outdoor space allows you to be comfortable…

A white covered entrance-way with wisteria

Entrance Transition

…comfortable arriving at the place, and comfortable leaving.

This sequence gives you the tools, in a few steps, to design an entrance transition for your house.

A mock-up of a curved entrance path
SEQUENCE OF STEPS FOR AN ENTRANCE TRANSITION

These are the steps you will follow in making your entrance transition:

  1. STEP 1: DEFINE A SINGLE SPACE WHICH EXTENDS FROM THE FRONT DOOR TO THE STREET
  2. STEP 2: CHANGES OF LEVEL AND DIRECTION
  3. STEP 3: FORMING THE TRANSITION AS AN ACTUAL SPACE
  4. STEP 4: THE FIVE SENSES
  5. STEP 5: THE INNER CENTER OF THE TRANSITION
  6. STEP 6: SHAPING THE MOUTH OF THE PATH
  7. STEP 7: MAKE ALL SPACES POSITIVE
  8. FINISH
A stone pathway
STEP 1:

DEFINE A SINGLE SPACE WHICH EXTENDS FROM THE FRONT DOOR TO THE STREET

Pick a house you would like to improve, and try to imagine a single, bounded, almost room-like zone which extends from front door to street, and includes them both. This room-like zone should be seen almost as if it were enclosed—yet without a ceiling, and with only partial walls, or boundaries.

An entrance-way
STEP 2:

CHANGES OF LEVEL AND DIRECTION

Have a look to see if it is possible to imagine that within the zone of transition, there might be a change of direction (in the path from street to house), or a change of level. Both these, IF THEY ARE SIMPLE, will help the sensation of transition.

A stone stairway
STEP 3:

FORMING THE TRANSITION AS AN ACTUAL SPACE

Now begin to imagine the transition zone more as an actual space, almost like a room, which has sides, walls, even a ceiling (sometimes). You should be able to imagine the transition space as a place which you can be in, and pass into, and pass through.

A covered entrance with vines
STEP 4:

THE FIVE SENSES

Here is where you can really create an effective transition. Put in characteristics that cause changes in light, enclosure, smell, texture, and view as you pass through the transition. Concretely identify the "things" which will cause these changes of light, enclosure, smell, texture and view.

Some examples: trees change the light and enclosure, a trellis with vines will change light and enclosure too, plants and flowers impart smell, brick pavers give a change of texture, a gap in a trellis or hedge gives a view, and so on.

A door leading off of the driveway
STEP 5:

THE INNER CENTER OF THE TRANSITION

Now begin to imagine, inside the transition space, a center which is the place in the transition zone that you will most want to "be": this is the most important place. It may be nearer to the street, or nearer to the house, or in the middle. It may be quite small, or it may occupy the entire space between street and door, but it must be a beautiful place where a person can BE.

The mouth of the path
STEP 6:

SHAPING THE MOUTH OF THE PATH

You should now enhance the mouth of the path, where it meets the public realm. It should provide some sense of passage, a slight separation, so that people coming don't feel unwelcome, and yet know they are entering your place. You might place things like a fence and gate, or a change of paving, or a hedge, or two trees, or an arch, or a step or two. This will create the mouth as a center, and will in turn help define the path and the transition as a whole.

Define and shape the mouth of the path as a gateway, enhancing itself, the path, and the public street space.

Matisse's Blue Nude (in B&W) Carpet design
STEP 7:

MAKE ALL SPACES POSITIVE

Now go through the whole design, making space more positive.
The individual spaces should be positive in character, as centers. And the physical elements (columns, beams, walls, seats) should also be positive, as centers.

The examples above show things where the positive space is very good.