The house volume is the single most important aspect of the making of a house. The volume sits in the land, and has the power to make the land more profound, or to be at odds with it.

Placing house volume

Placing a House Volume on a Piece of Land

If badly chosen, it can ruin every aspect of the house, its interior life, its garden, and the street it is on. If chosen well, it is the origin of life in all these things: interior, daily life, garden, and street…

SEQUENCE OF STEPS FOR PLACING A HOUSE VOLUME ON A PIECE OF LAND

These are the steps you will follow in placing your house volume:

  • HELP SCREEN I: HOW TO MAKE A ROUGH DIAGNOSIS OF THE LAND
  • HELP SCREEN II: HOW TO TAKE A ROUGH SURVEY OF THE LAND
  1. STEP 1: WALK THE LAND
  2. STEP 2: OBTAIN A TOPOGRAPHIC MAP AND PHOTOS OF THE SITE
  3. STEP 3: DIAGNOSIS
  4. STEP 4: BUILD A MODEL OF THE LAND
  5. STEP 5: NOW RE-VISIT THE LAND, AND FIX YOUR FAVORITE SPOT
  6. STEP 6: NOW WALK ABOUT, PLACE STAKES, AND MEASURE ROUGHLY WHERE THE HOUSE VOLUME MIGHT GO
  7. STEP 7: VOLUME STUDIES ON THE MODEL
  8. STEP 8: HARMONY OF THE VOLUME IN THE LAND
  9. STEP 9: FINALIZE THE VOLUME, AND MAKE POSITIVE SPACE EVERYWHERE
  10. STEP 10: MAKE THE HOUSE VOLUME BEAUTIFUL AND SIMPLE
  11. FINISH
HELP BEFORE YOU BEGIN:

MAKING A ROUGH DIAGNOSIS OF THE LAND

Before you start trying to place the house volume, you must start by assessing what is there on the site, so you can improve on the life which is already there. That is what we mean by a diagnosis.

To make a diagnosis you must identify the following:

  • Places that are really good, and should be left alone, and nurtured and kept and protected.
  • Places that have potential to become good, they inspire something, but they are not really good right now.
  • Places that are really bad and need fixing.
  • To this list we may also add a fourth category in your diagnosis. If you see elements either conspicuously present, or conspicuously absent, you should include them in your diagnosis. Thus:
  • Essential centers that are missing, and need to be strengthened.

You should identify these four kinds of places on your site, both by marking them with color on the map of your site, and by writing down what you mean.

HELP BEFORE YOU BEGIN:

TAKING A ROUGH SURVEY OF THE LAND

YOU CAN MAKE A ROUGH SURVEY YOURSELF

This is to save a few hundred dollars, and to get an idea of the house volume, without too much delay.

Get hold of a rough map—it can be the parcel plot. or you can pace it off, and make sure you get the angles at the corners right.

By pacing put in major landmarks—big trees, other buildings, walls, …

Now go to the bottom of the site. Stand at the lowest point. If you keep your eyes looking dead level (as if at the distant horizon—only you will not be able to see it looking up-slope) the points you see will all be about five feet higher than where you are standing. (because your eyes are about five feet from the ground, and if you are looking dead level, the place your eyes land on are all five feet higher than where you are standing.

Mark these spots in some way, (sticks, stones, etc).

Then repeat the process, standing at those points, and again, finding the points which are five feet higher than they are.

Following this process you can make a rough map, with five-foot interval contours. If you want 2.5 feet , you can interpolate between them.

This is not good enough for exact work, and I wouldn't recommend building from it. but it will give you a surprisingly accurate picture, certainly good enough to let you build a rough model, and to follow the house volume sequence, so you can place and shape your house successfully.

Walk the land
STEP 1:

WALK THE LAND

Start by visiting the land. Walk the land. Identify that place on the land which draws you, which is most beautiful to you, which you are most able to love…

You should make this place as something to preserve, and keep as much as possible that present beauty which stirs you now. Imagine it at the same time, as the garden of the building, a beautiful center, positive and living.

In very preliminary fashion you might also begin to imagine where you would have to place the house so that this beautiful part of the land becomes healed … the one most important spot which is most beautiful to you is made better. How can you build the house so that it enhances and protects the beauty of the land?

It will be helpful to have a first vague picture of the house as a center which—because of its position—supports and helps the garden that is the place you love.

Topographic map of site
STEP 2:

OBTAIN A TOPOGRAPHIC MAP AND PHOTOS OF THE SITE

  1. Get a topographic map of the land (at 1:200 scale, or 1/16th inch = 1 foot). You will probably need to get a surveyor to do this for you. If so, it will take a few hundred dollars. If you have the skill, you can do it roughly, for yourself.
  2. Take some photos of the land, and choose the one which gives you the best view.
  3. Scan the map and the photos and store them in your computer.
Placing house volume
STEP 3:

DIAGNOSIS

Visit the site again.

Take a topo with you. Mark up the site map with positive and negative places identified exactly in position and scale Using a print of the site at 1:200, write about the places where you want to preserve the outdoors, and the places you feel are most promising as places for the house volumes.

Write whatever you want on the drawing, that is expressive of what you feel in different places. Mark all your most important feelings about the site, IN the physical location where they occur—views, a place where you feel tranquil, places to stay away from, a place where you might be able to plant daffodils…

Modelling house volume
STEP 4:

BUILD A MODEL OF THE LAND

You may need to get an architect to this for you. If so, it will take about a day of an assistant's time. If you have the skill, of course do it yourself.

  1. Build a model, at 1:200 (1/16th inch equals 1 foot).
  2. Use layers of cardboard for the contours (make certain that the vertical thickness of the cardboard is 1/8 scale for two foot contours, otherwise the slopes will be unrealistic).
  3. Put bushes and trees. They are very important and must be placed accurately, with height, thickness and position exactly right, since the wholeness of the land is governed by them, and the placing of your house volume will be affected enormously.

The image above is what the model should look like.

The empty site
STEP 5:

NOW RE-VISIT THE LAND, AND FIX YOUR FAVORITE SPOT

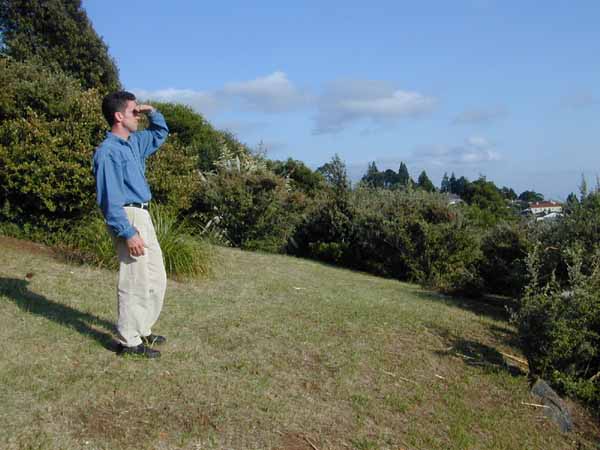
Revisit the land. Now fix on the model, the most beautiful place which is, for you, the focus of the site.

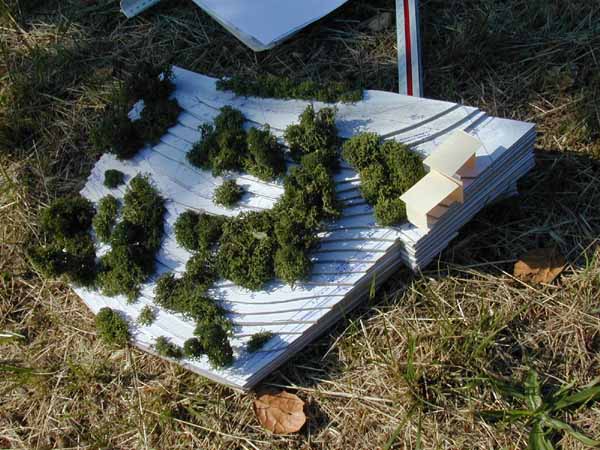
Take the model with you, and walk the land again. Fix in your mind, the place which is most beautiful, which best answers the question "This is why we bought this place."

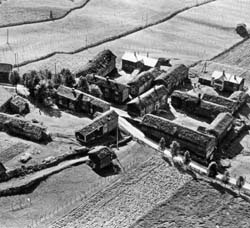
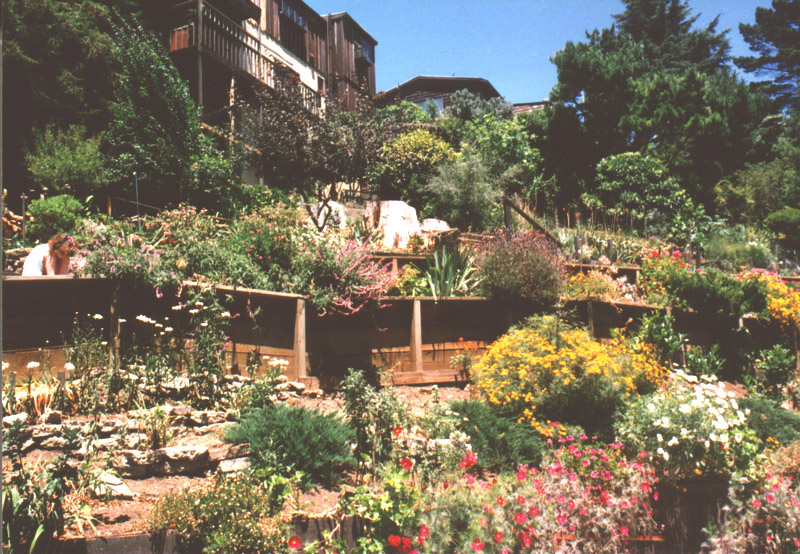
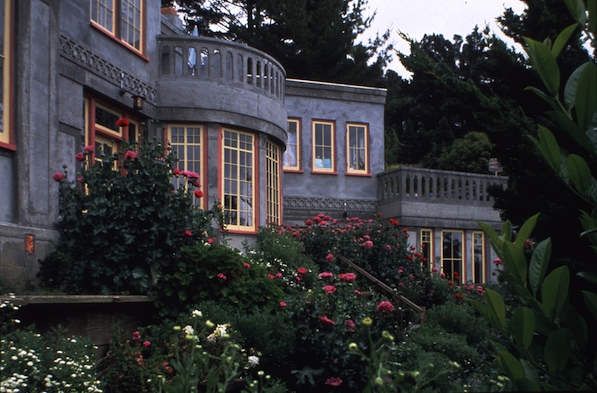
On the particular piece of land shown in the above picture, this was one spot that had this quality:

It needs to be a place which is most beautiful, which gives you feeling, which has most life, and which will become the outdoor focus of the house, and which you most want to preserve and enjoy when you have your house.

It looks, in the picture as if the whole site is like this. However, it is not. There is only one spot which has this beautiful feeling, and all the other places have less magic, have less of the feeling you see in the picture, as a place you might want to preserve and keep, and use.

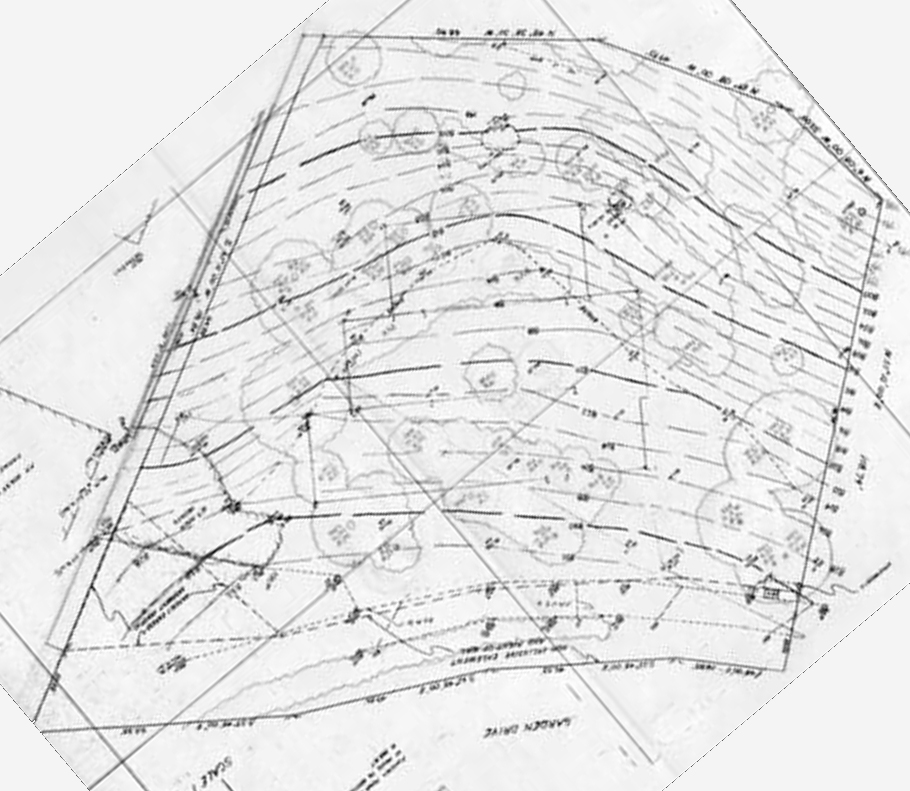
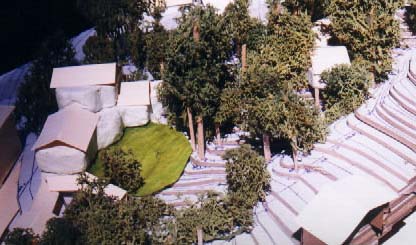
As you will see on the Diagnosis picture, it is one of the smallest areas on a very large site, and it took a lot of work to identify it and be sure about it. On this particular piece of land, this was one spot that had this quality. Click the picture to see it at full size.

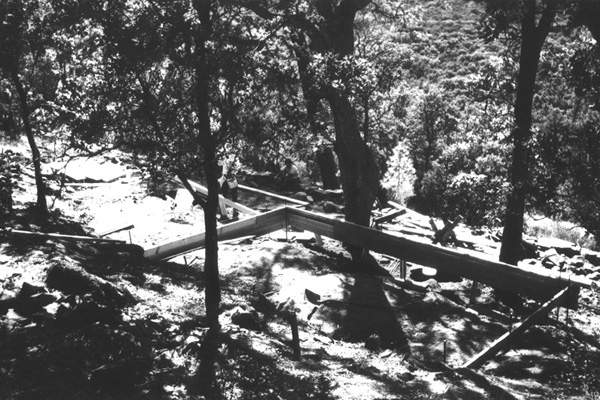
Measure the position and dimensions of this special piece of land.

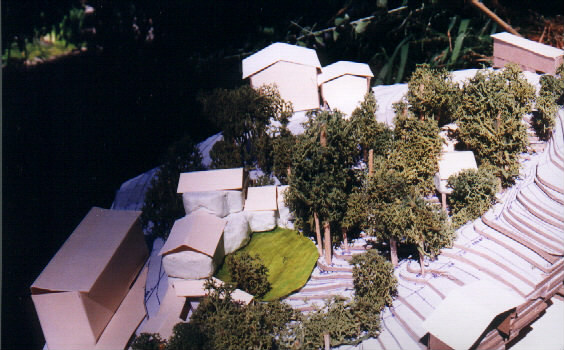
Transfer your measurements to the model, so you have, on the model, a mark showing the outdoor place which is to be protected and preserved.

You should make this place as something to preserve, and keep as much as possible that present beauty which stirs you now. Imagine it at the same time, as the garden of the building, a beautiful center, positive and living.

In a preliminary fashion you should now also begin to imagine where you will have to place the house so that this beautiful part of the land is healed. How can you build the house so that it enhances and protects the beauty of this special piece of land?

The empty site
STEP 6:

NOW WALK ABOUT, PLACE STAKES, AND MEASURE ROUGHLY WHERE THE HOUSE VOLUME MIGHT GO

REVISIT THE LAND AGAIN, NOW WORK OUT WHERE TO PUT THE HOUSE.

Take the model with you, and walk the land again. Walk around, with some stakes and surveyor's ribbon, and think where the house might be, to help shape the beautiful outdoor place you've identified. Think of the house as a cupped hand holding water—the house forms and shapes and helps the outdoor place.

Place stakes, and move them around, until it feels about right. At this point don't worry TOO much about house size, or number of stories, or about making corners which are exactly square. Just get the feeling of the house location right.

When you are happy with the rough location of the house, measure the position of the stakes.

Transfer these house corners to the model, so you have, on the model, marks showing the perimeter of roughly where the house ought to be.

Modelling house volume
STEP 7:

VOLUME STUDIES ON THE MODEL

Now sit with the model, and try out different house volumes and masses, that correspond with the rough location you've set on the site. This is where a model allows you to quickly evaluate things that would be very slow and difficult or even impossible to try on the site itself.

Use materials which are easy to work with and change, to represent the building and its pieces and wings. You might use some modeling clay, or bits of paper, or matchboxes, or erasers, or anything fast to work with which you have close at hand. We once used a stapler to model a long thin house!

You should quickly run through many versions of house volumes. Now is the time to think about house size, how many stories, which bits are two story and which are one, and so on.

Modelling house volume
STEP 8:

HARMONY OF THE VOLUME IN THE LAND

THE PRINCIPAL CRITERION.

Judging the volume, from the model, and from the land, is what matters.

Other aspects of the house (entrance, disposition of rooms, interior plan) should not play a role.

The thing you are trying to get right, at this stage, is the beauty of the volume, as something which heals the land. If you can do it right, the beauty of the house, in the land, will live for ever.

House volume
STEP 9:

FINALIZE THE VOLUME, AND MAKE POSITIVE SPACE EVERYWHERE

Here you should review and recap and fine-tune what you have done, and keep in mind the following patterns, which may help you.

SITE REPAIR

The building is built in what is left over after a beautiful garden has been chosen. Start by choosing the place which will be the garden, and which will make the most beautiful outdoor space, which will be shaped, and loved, and left alone. On no account think of placing the building in the places which are most beautiful In fact, do the opposite. Consider the site and its buildings as a single living ecosystem. Leave those areas that are the most precious, beautiful, comfortable, and healthy as they are, and build new structures in those parts of the site which are least pleasant now.

SOUTH FACING OUTDOOR SPACE

The building lies to the north of the outdoor space that goes with it, leaving the outdoor space to the south, filled with sun.

POSITIVE OUTDOOR SPACE

The cottage is carefully placed to make the garden positive. A positive space is a space that has a definite shape and exists as a felt center. Each important part of the garden is positive, clearly marked and surrounded, and has some degree of enclosure, being surrounded by wings of buildings, trees, hedges, fences, arcades, and trellised walks, so that it is felt as an entity with a positive quality.

HALF HIDDEN GARDEN

The garden is not fully in front of the house, nor fully to the back. Instead, it is in some kind of half-way position, side-by-side with the house, in a position which is half-hidden from the street, and half-exposed.

WINGS OF LIGHT and LIGHT ON TWO SIDES OF EVERY ROOM

The house is narrow and simple. Rooms are made so that each room in the house has two exterior walls with windows so that natural light falls into every room from two directions.

A beautiful view corridor
STEP 10:

MAKE THE HOUSE VOLUME BEAUTIFUL AND SIMPLE

IN ANY CASE, IT MUST BE A SHAPE THAT FILLS YOUR HEART, AND MAKES YOU FEEL THE BEAUTY OF THE LAND, EVEN MORE THAN THE LAND WAS DOING IT WITHOUT IT. That is the golden rule!

The house should end as a simple and rather magnificent shape, which fits into the land, and with only minor variations to take care of needed outbuildings, smaller roofs, special funny bits needed to accommodate some tree, or special room.

Otherwise, the house should be as simple as possible—in the simplest case a rectangular volume, and nothing more.